 Shopify merchants around the world use the platform to construct, expand, and manage their businesses. Shopify apps are a huge part of their success as it provides them the tools to handle specific business challenges. If you are new to the eCommerce business, it can be hard to know where you should start to build Shopify app. In this article, we will help you with that.
Shopify app ecosystem: What should you know?
Before we help you build Shopify app on your own, it’s best that you first understand the integration of apps with the Shopify app ecosystem. This includes the role of apps within Shopify, the kind of technology and infrastructure available to app developers, and the app categories you can develop.
How apps fit into Shopify
Shopify is known to provide business wonders with a quick and easy set up process. But as we all know, each business has unique requirements and most use apps to address them.
These Shopify apps are web applications that help business owners to customize their Shopify experience to meet their business needs.
Apps are integrated in Shopify by:
- Connecting with Shopify APIs (mostly Admin API), which helps apps in accessing and managing data such as orders, inventory, customers, fulfillment, and a lot more
- Adding new features to the existing Shopify Admin or POS sections
- Improving how eCommerce stores present information to their customers
Type of Apps
Shopify apps can have either of the two levels of accessibility:
- Public Apps – These apps can be listed in the Shopify store and are accessible to multiple merchants
- Custom Apps – Custom apps are designed for a single merchant and cannot be listed in the Shopify app store. They are also created in the Partner Dashboard
The Shopify App Store
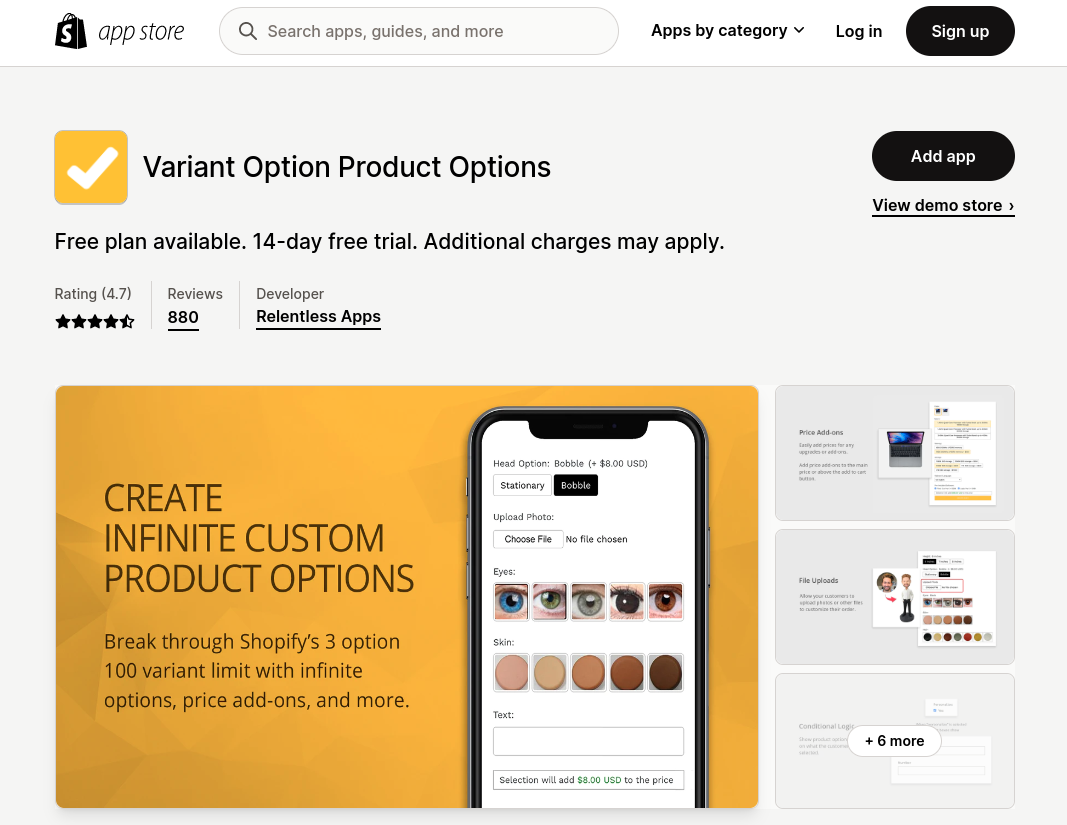
The Shopify App Store helps merchants find apps that help them improve the capabilities of their stores. There, you will find categories and also features a powerful search tool to help you find what you need. Additionally, the Shopify app store uses an algorithm that helps you by recommending apps that will best fit your business needs.
Public apps, from its name, are accessible publicly in the Shopify app store. On the other hand, listed apps are visible to all merchants while unlisted apps have restricted visibility. Both listed and unlisted apps have their own characteristics, which will depend on what your business needs are.
Since listed apps are visible to all merchants in the Shopify app store, you will be able to highlight and show the key features your app can provide. You will also have access to features like in-app store ads for listed apps.
Having unlisted apps in the Shopify store, however, lets you limit access to specific merchants or users. Also, you can keep these apps hidden during off-seasons or maintenance times. It is highly recommended that you list your apps publicly in the Shopify app store to enjoy its full advantages and features.
Getting started with your Shopify app development
Now that we’ve already introduced you to the basics of the Shopify app platform, it’s time to check and validate your app idea to make sure that the app you are going to build is an app that is useful and helpful to your target users.
Does your Shopify app development idea help merchants solve their problem?
First thing to consider when validating your app idea is to make sure that it solves real merchant problems. Since we are talking about solving business problems, these should be something that causes merchants significant money, time, stress, or effort in finding a resolution.
The best and easiest way to understand what most merchants are struggling with is to reach out to them directly. You may also join forums like the Shopify Community Forum or the Shopify subreddit and join in conversations with merchants to get their feedback. Additionally, you may also join Facebook groups related to the industry you are focusing since it’s one of the widely used social media platforms today.
The next step would be to send these merchants a feedback form with a list of questions that will help you better understand the problems they’re facing. If you are confident that your app idea can resolve a real merchant problem, your next move would be how they are already trying to fix them.
What are the trends in the industry and what’s happening?
Every industry faces unique challenges. We highly recommend that you are always informed about what challenges these industries are facing, and trends that affect their merchant journey. The basic trends are usually marketing, finance, shipping, customer support, product sourcing, and more. Being able to understand its past, current state and possible concerns is important.
Conduct a market research
If you don’t know much about the industry you’re building the Shopify app for, the best thing you can do is to conduct a market research for your app idea. Here are some ways on how to do it:
- Reading industry reports
- Follow leaders and industry experts on social media platforms
- Always read updates about commerce and business news
- Industry experts consultation
- Creating or joining forums
- Take note and analyze concerns and feedback from merchants on social media platforms and forums
- Take note of app reviews on the Shopify App Store
- Subscribe to newsletters
- Attend events related to the industry
- Read relevant articles and blogs
Also see: 10 Best Shopify Page Builders in 2023
Building your first Shopify app
Now that you learned the basics and how to validate your Shopify app development ideas, it’s time that you start to build Shopify app.
Step 1. Register and create a Shopify Partner account

Go to https://partners.shopify.com/signup to start signing up. You may use your email address, Apple ID, or link your Facebook or Google account to sign up.
Step 2. Create a test store
Once you register for a Partner account, you will be able to create a development store for free. Since creating one is free, it comes with some limitations. You don’t have to worry about this since you will be able to create multiple development stores if you need to.
Once you create an app development store, you will be able to test any app of themes that you create. Additionally, you will also be able to set up Shopify stores for your clients.
Follow these steps to create a test store:
- Go to https://accounts.shopify.com/ and use your credentials to log in
- Click on “Stores”
- Click on “Add store”
- Select by clicking “Development store” under the “Store type” section in the page
- Look for and go to “Login information.” Enter your store name and create a password for your development store log in. NOTE: The username is default to your Partner Dashboard email address. If you want to use a different username, you can change this information
- Optional: You may tick the “Create a non-transferable store that uses a developer preview” option if you want to enable developer preview. A dropdown list will appear and select the preview version you prefer
- Type in your address in the “Store address” field
- Optional: You may select the reason for creating your app development store under the “Store purpose” section
- Click on “Save”
Step 3. Download and install Node.js
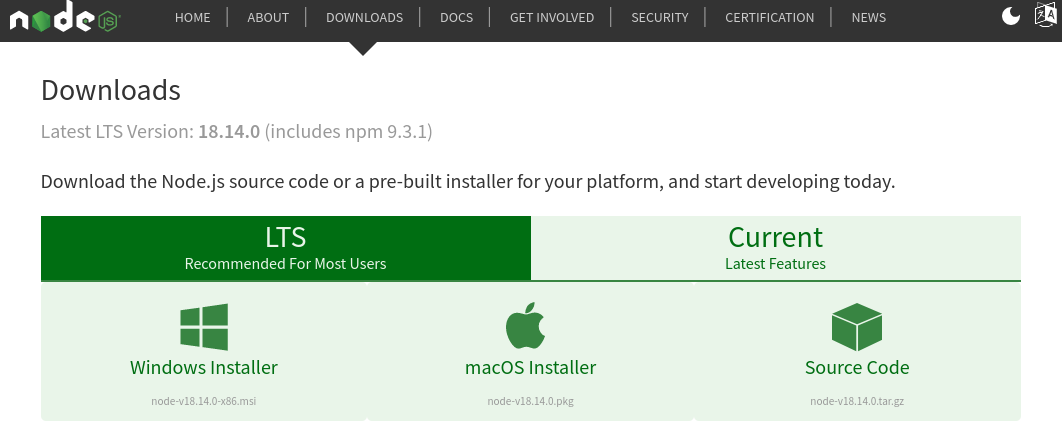
Go to https://nodejs.org/en/download/ to install Node.js. You may select LTS which is recommended for users or Current to download the version including the latest features. Click on either Windows Installer, macOS Installer, or Source Code depending on your device.
Step 4. Download and install Shopify CLI

If your computer is running on Windows 10, make sure that Ruby+Devkit is already installed on your computer. You can do this by using RubyInstaller for Windows. You can also use Shopify CLI with Windows Subsystem for Linux by installing the Windows Subsystem for Linux and Ubuntu VM.
Once you’re done, you can go to RubyGems and use RubyGems.org package manager to install Shopify CLI. Then, go to your home directory on your computer and run the gem install shopify-cli command:

Next, run another command: shopify version to make sure that Shopify CLI has been installed to your computer properly

Step 5. Log in to Shopify using CLI
For you to be able to start creating your Shopify app project using CLI, you need to log in to Shopify first. To do this, just run the command: shopify login.

A browser tab should automatically open. Use your Partner credentials to log in. Once you’re logged in, you will see the following confirmation message: Logged into store xxxxxx.myshopify.com in partner organization xxxx.
Step 6. Start creating a new project
Once you have successfully installed Shopify CLI, you will already be able to create and start your new project. Start by going to your directory and type in the command: shopify app create node. This command will set up a Node.js app in a subdirectory and simultaneously create your app in the Partner Dashboard.
Step 7. Start a local development server
After creating your app, you will be allowed to develop it. Start by navigating to the project directory page and run the command: shopify node serve to launch a local development server. Shopify CLI utilizes ngrok to establish a tunnel that lets your app be accessed through HTTPS URL which is a requirement for creating apps.
Step 8. Install the app on the app development store
While the server is running, launch the URL that was printed out by your terminal in Step 7. Once you open it, you will be instructed to install the app on your development store.
After following the link, you will see a message with your app and its scope. Click on the install button.
Step 9. Start building your Shopify app
The previous steps were for creating your new app using Shopify CLI. The next step would be to start building your Shopify app.
When you build Shopify app, you will have to complete several tasks to implement specific functionalities in your app. Your app will be a basic one, but there are still ways to develop it and add more complex features independently.
Step 10. Populate products
With the help of Shopify CLI, you will be able to add example data when testing the behavior of your app. It also has a feature that lets you make records for customers’ products, and also draft orders.
In order for your app to interact with the product date, you will need to populate products to your development store.
- Launch a new terminal
- Go to the project directory
- Run the command: shopify populate products
Step 11. Add an empty state
Now that you are able to run your app in Shopify, the next step is to preview and test your frontend components as you construct them. Utilize Polaris, Shopify’s React component library and design system, to develop your user interface.
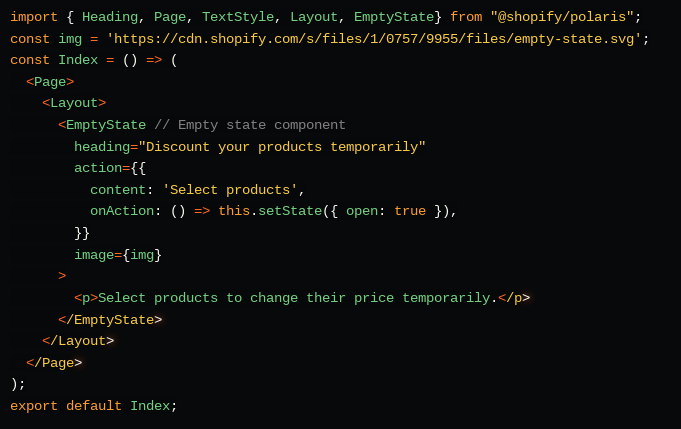
To add an empty state to your app, you will use Polaris. The Polaris Empty state component helps in communicating your app’s value and its main action when merchants initially install it in their Shopify admin.
- Go through your pages/index.js file in the code editor
- Replace the file contents with an EmptyState component
Step 12. Add a resource picker
Next, include a “resource picker” so that you can choose products within your app. Utilize App Bridge, Shopify’s standalone JavaScript library, to add a resource picker.
The App Bridge ResourcePicker action set offers a search-based interface to aid in finding and selecting one or multiple products, and then returns the selected resources to your app.
In the “pages/index.js” file, create a class that establishes the state for the resource picker. Then, add the ResourcePicker component to the main action button on the EmptyState component.
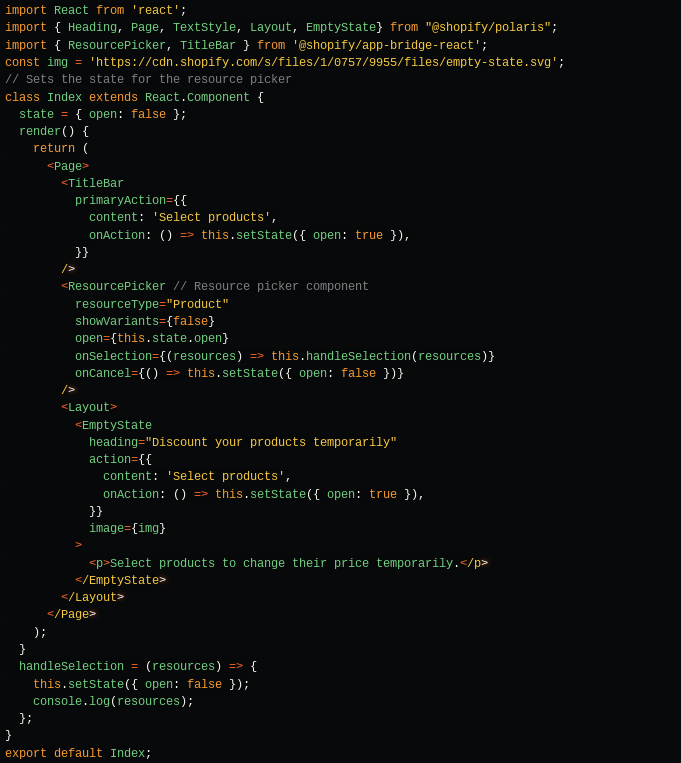
In your embedded app, clicking “Select products” opens the “Add products” modal.
Step 13. Add a resource list
With the resource picker in place, you need a method to retrieve products. You can use the GraphQL Admin API to obtain products. Your goal is to showcase these products in a “resource list.”
To enable your app to query data using GraphQL, create a new “ResourceList.js” file and include the “graphql-tag” and “react-apollo” imports in the file.
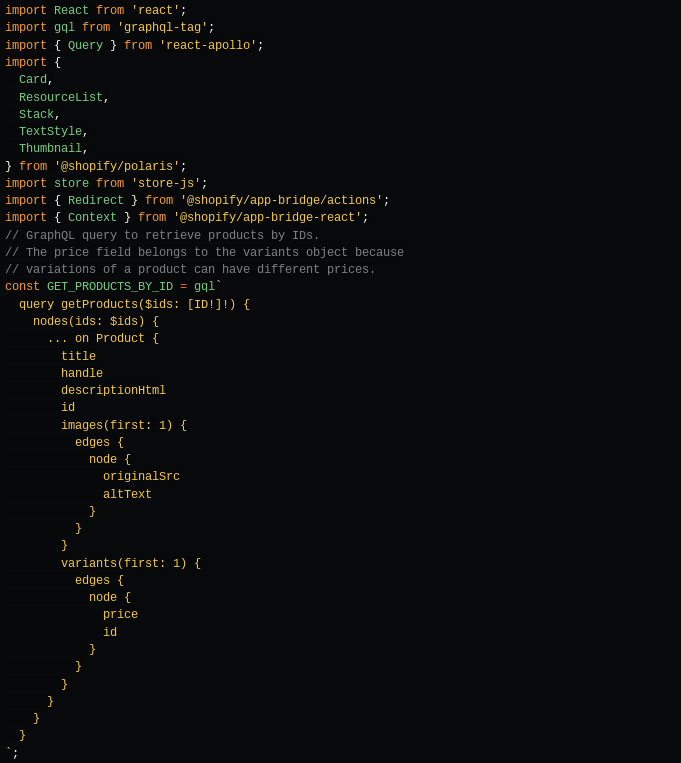
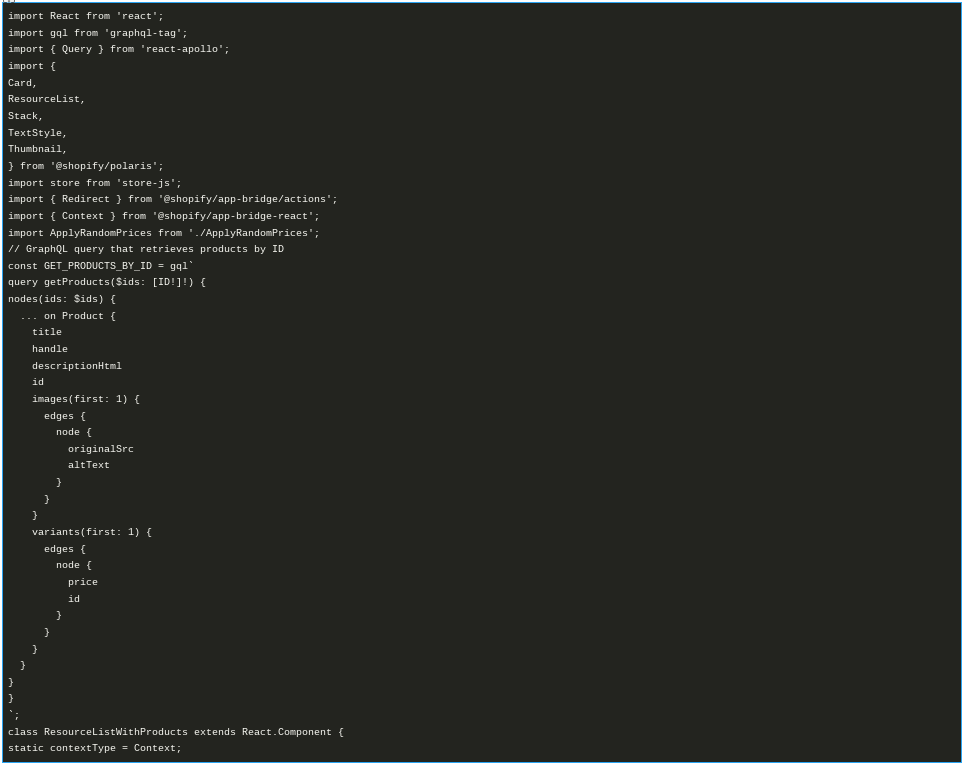
Then, establish a GraphQL query named “getProducts” to gather a list of products and their prices.
- Run “npm install store-js“
- Create a new “components” folder in the “pages” folder in your project and create a new “ResourceList.js” file within the folder
- Include imports in your “ResourceList.js” file and set up your GraphQL query to retrieve products and their prices.
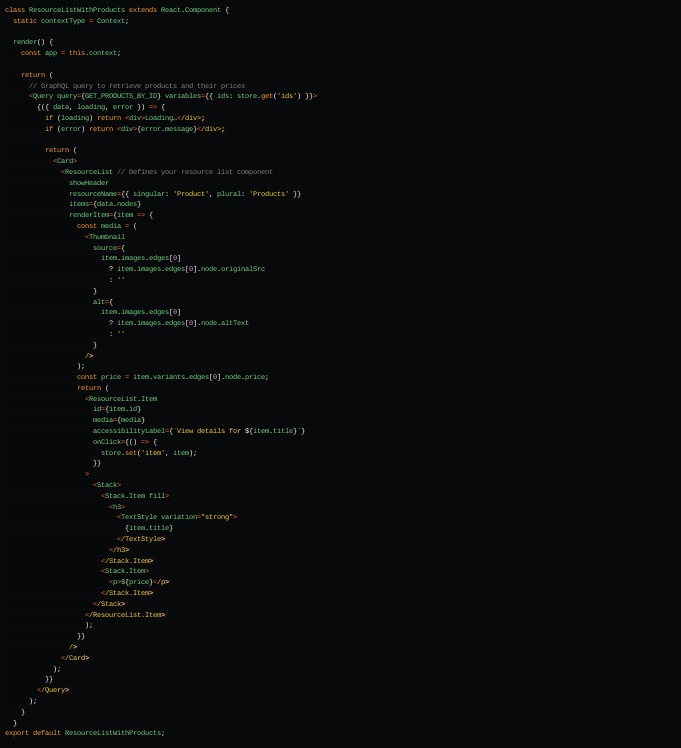
In your “ResourceList.js” file, following your GraphQL query, establish a class named “ResourceListWithProducts” that extends the “ResourceList” component and returns products and prices. Then, define your “ResourceList” component.
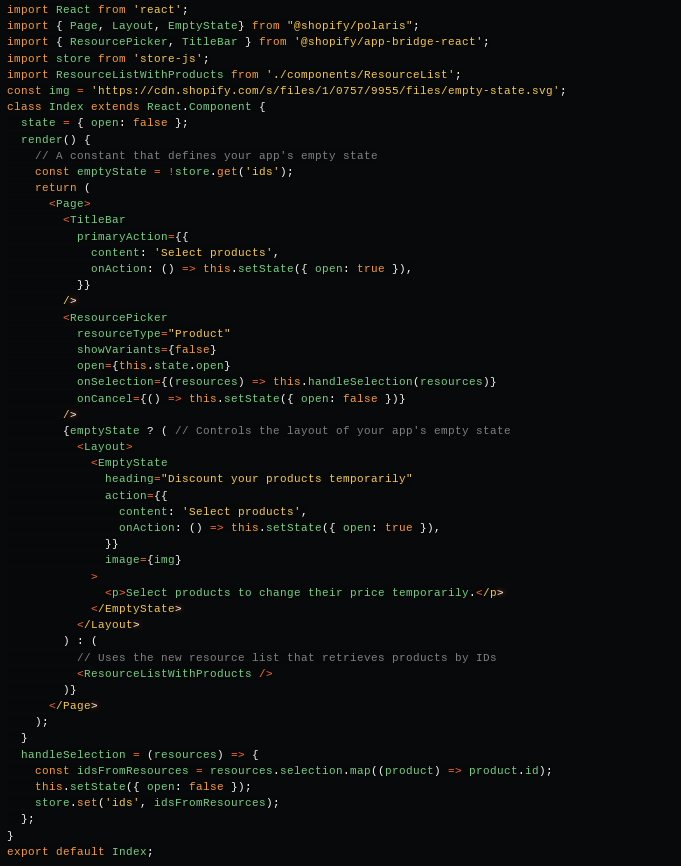
In the “pages/index.js” file, add your imports and define a constant for your app’s empty state. Then, revise the code controlling the layout of your empty state and specify using your new “ResourceListWithProducts“.
A list of products will display whenever you click on “Select products” and add products from the modal.
Step 14. Update the product prices
You’ve implemented a GraphQL query to read product data, and added the functionality to display the retrieved products in a resource list.
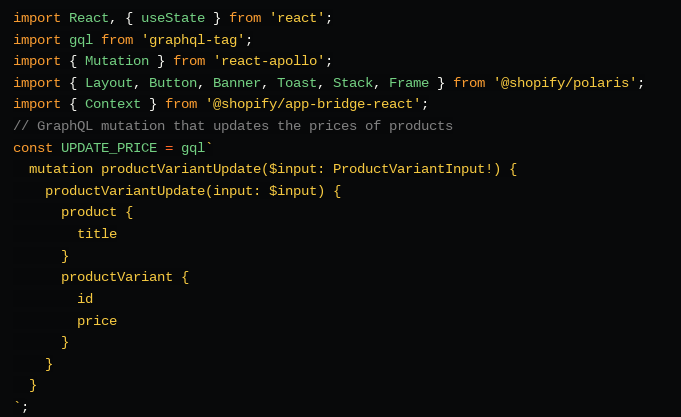
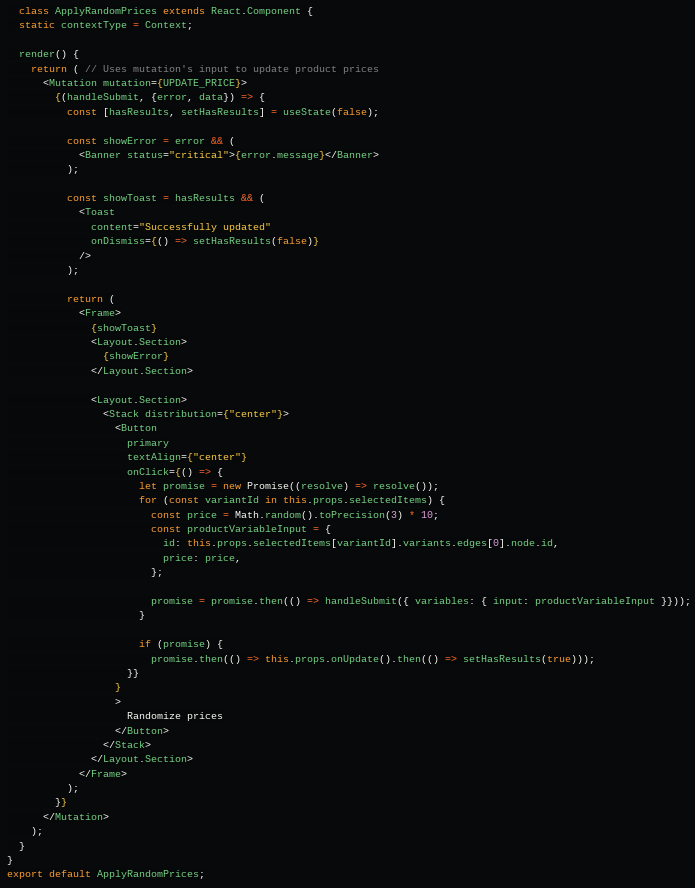
Next, you’ll use GraphQL to modify product data. In order to update the prices of products in your app, create a GraphQL mutation called “ProductVariantUpdate.”
1. Create a new ApplyRandomPrices.js file in your components folder
2. Add imports to your ApplyRandomPrices.js file and set up a GraphQL mutation that allows your app to update the prices of products
3. In the “ApplyRandomPrices.js” file, establish a class named “ApplyRandomPrices” that takes your mutation’s input and applies a random price to the selected product
4. Update the “pages/index.js” file to include the following imports and add the import for “ApplyRandomPrices“

5. In “ResourceList.js“, include the “ApplyRandomPrices” import. Implement a constructor on your “ResourceListWithProducts” class and update your GraphQL query to enable refetching of products by ID
6. Finally, revise your “ResourceList” component
Also see: Top 12 eCommerce Software with Inventory Management in 2023
Frequently Asked Questions:
How much does it cost to build Shopify app?
Building a Shopify app normally costs around $20,000. If you are building a Shopify app with simpler features, the cost could be around $15,000, while some with more advanced features could cost up to $25,000.
When you build Shopify app, how do you keep the app secure?
Securing your app is of utmost importance in ensuring its success and growth. Proper coding practices and strict data management will reduce the risk of data breaches and maintain trust among your app’s users.
When you build Shopify app that interacts with merchant stores, it may have access to sensitive information such as personally identifiable information (PII) of merchants and customers. This requires ongoing attention and cannot be overlooked, as protecting such information is a significant responsibility.


